Pages

Showing posts with label Doll Quilts. Show all posts

Monday, September 27, 2021

Design Wall Monday - September 27, 2021

Good Morning Quilters!  What did I work on this last week?  A doll quilt!  With Buttons.  Have you ever made a small quilt/doll quilt that has buttons on it? 


(Of course, this doll quilt cannot be used by little children, because the little buttons might come off and be swallowed), but it is fine for a doll quilt for a grownup like me.  Here is the story of this cute little quilt:

My friend Joan Brink brought over a small quilt kit she had received from a friend, and it was so cute.  We both decided to make it.  Here is the pattern, from the Red Button Quilt Co. (Here)


Joan's pattern included the fabrics, and some tiny little colored buttons to sew on the embroidered border around the quilt.  Here is Joan with her kit when she came over to my house yesterday.  She has the top all finished except for sewing on the little buttons.  You probably can't see them, but the package of little colored "flower" buttons that came with the kit are in her right hand.  Joan is going to hand quilt her little quilt.


When I made my version, I had fun sorting through my shoebox of half-square triangles to find four alike to make into pinwheels for the quilt:


I love pinwheels, and this little quilt went together so easily.  I have a little glass jar full of pearl baby buttons, and I used some of them on my doll quilt.  I sewed a button in the middle of each pinwheel and also used the tiny pearl buttons for flowers in the border around the edge.  I put the batting and the backing together before I sewed all the little buttons on, and the buttons served as the "quilting" to keep the three layers together.  I sewed each button on separately, and tied and cut the threads, leaving the thread ends showing on the front, so it is technically a "tied" quilt.  I also put triangle hanging sleeves on the top two corners of the back.

If it isn't a free internet pattern, I don't like to make a quilt with a pattern unless I have actually supported the designer and bought the pattern.  So I ordered this pattern and am giving it away to any of you who are reading this blog.  Leave a comment below if you would like to be included in the drawing for the pattern.  The pattern will include a set of small colorful "flower" buttons with it, but no fabrics.  

I had this same issue with making a quilt without buying the pattern once before, and you can read about it here (Here)  if you are interested.  It is a pattern from the same pattern company, and another cute little quilt with buttons on it.

What have you been making this week?  I have spent extra time caring for my sister, and embroidery time while with her has been a peaceful pastime.  I hope to have another May flower garden block or two to show you next week.  

Please join in the Design Wall Mondays linky party below, and show us what you are doing.  Thanks for joining in!  A special thank you to those of you who mention Design Wall Mondays in your blog, and also provide a link back to this page.  


You are invited to the Inlinkz link party!

Click here to enter

Thursday, December 27, 2018

The Last Quilt Finish of 2018

This post is about a long overdue baby quilt that I had a fight with.  But I won!  Our physical trainer, Kelsie, had a baby last year, and now is pregnant for her second child.  The baby quilt she is just now getting is below:


The trouble started when I selected a flannel backing for this baby quilt.  When I tried to quilt it, the trouble began.  It stretched, and lumped on the back - not pretty.  So I read about flannel, and took the backing off, washed and starched it.  Starched it stiff as a board!  But the washing made it shrink too small to be a backing any more, and I put the project away for a while.  When Kelsie's baby kept getting older, I felt guilty and thought it was time to finish this up.  I bought a cotton backing, and took it to a long arm quilter to finish.  Binding was added, and the quilt is now ready to give away.  Some projects just don't cooperate with me.  But perseverance is my middle name.

Since it is a little late for her first baby's quilt, this quilt is for the baby due in 2019.  And her firstborn sweet girl will receive a little dolly quilt and a little dolly.  Here are more pictures below:


The label on the back of the baby quilt:


The pen is a felt tip one, and is a little blurry to write with.  Any recommendations for a better permanent pen?  Here's one last picture of both quilts and the little dolly.  


Measurements are 40 in. by 50 in. for baby quilt, and dolly's is 10 x 10 in.

This is my first Non Design-Wall-Monday post for quite a while.    I will post again on the last day of 2018, for our usual linkup.  See you then!

Monday, November 12, 2018

Design Wall Monday - November 12, 2018

Today is Veterans Day in the United States.  There are, according to the History Channel, 16.5 million living veterans who have served in at least one war, and 5.2 million living veterans who have served in times of peace.  Thank you to all of our veterans for your service and sacrifice. 

While visiting our daughter last week, I made replacement oven mitts for some I made for her a few years ago.  I made a bunch of these for Christmas presents back then, and our daughter was my "tester"  for size and padding advice.  Here are the the old ones, which were well worn:


Here are the replacement oven mitts that were finished while I was visiting her:


She is an expert zippered bag maker, and I am afraid of zippers.  Soooo, she helped me make a zippered bag, and showed me several tutorials on the Internet that I can follow to make more of them.  I am now slightly less afraid of zippers, thanks to my dear daughter.  Thank you Christa!  This little "doggy" bag will stay in the car with treats for our dog, so I will not forget to have rewards for Penny on car trips.  I think it is so cute!!! and I put the zipper in by myself!!!


When I returned home, I worked on finishing a little nine patch doll quilt that I had asked you for opinions on a few weeks ago. (in this post)  Most of you liked the on point setting, and the cheddar print for sashing or alternate block.    But I couldn't ever decide on what I wanted for cornerstones, so I tried a different sashing that didn't require cornerstones.  However, I found it does involve many partial seams, and I would like to find an easier way to do this "basket weave" sashing look.   Maybe pressing the sashing edges under, and weaving it first and then sew it to the nine patches by hand.  Anyone tried it, and have any tips?

It measures 12.25 inches square and the nine patches are 1.5 inches finished size.  Sophia Grace and Rosie are very pleased with it.


I do like how it looks, and have bound it without quilting it, as I am not sure what color thread to quilt it with, and where to put the quilting.  Maybe I will leave it without quilting, as it is a small doll quilt.  Too many decisions for my brain this week.

I cut the bias binding at one inch wide, not thinking about what I was doing.  I had planned to only single fold it, but still, one inch is too narrow.  I made a note to myself to use only down to 1.25 inch single fold binding in the future, as my limit to smallness in doll quilt bindings.  Here's a closeup of the binding:


What are you working on this week?  I so enjoy looking at your design walls...so many interesting projects going on.  Thanks for participating.  As usual, I ask please that you refer back to this particular blog post somewhere within your blog post.  


Monday, October 1, 2018

Design Wall Monday - October 1, 2018


It was so good to be back to quilting, and I made hanging sleeves and quilt labels for seven doll quilts that will be in a quilt show in Virginia next spring.  I am going to Virginia later this month, and want to leave them with the Churn Dasher's Group when I meet with them.


Two of the quilts are from Lori Dejarnett's blog quilt-a-longs.  Her blog (Humblequilts.blogspot.com) is having another doll quilt group project coming up this week.  I think the first part of the instructions come out this Wednesday.  I am planning to participate, it's always fun.

This one below was a quilt she called "Mid-Winter Blues".  I renamed it "Raggedy Ann's Doll Quilt", as it looks great with my Raggedy Ann and Andy dolls.  It's 20.5 inches by 20.5 inches square.


The next one is also from her blog, and she named it "Abundance".  I also kept that name for it.  It is 10.5 inches by 10.5 inches.


Last week started off Monday evening with Miss Penny going to the emergency room, but the issue was resolved quickly.  It was a bad ear infection and possibly also an allergic reaction to something, but she's all better now.  The only sign that she had some trauma is the two shaved patches on her ears (her ears were swollen up, and they had to be drained).  She is as good as new now, though.  She's on benadryl for a little while longer, and ear drops for the ear infection.  Nothing phases a labrador!  She is 47 pounds now, and still growing.


But back to quilts:   Here are three pictures showing all seven quilts on my coffee table (my design wall today):


The hanging sleeves are four inches deep, and must be the width of the quilt.  The labels are made on my computer printer.  I first cut fabric and freezer paper to the size of a piece of computer paper (8.5 by 11).  I then iron them together, and sew a line of stitching near the top of the 8.5 end.  The line of stitching keeps the two pieces together while they are feeding through the printer.  I only feed one through the printer at a time, to keep from having printer problems.

I use Microsoft Word software and prepare the label info, choosing a font that I like.  These were printed two per 8.5 by 11 sheet, and after coming out of the printer, I iron them again.  I cut off the line of stitching that is holding the freezer paper to the fabric, and then pull the freezer paper off.  The fabric labels are then cut to size and stitched to the back of the doll quilts, easy peasy.

Here are two of the labels shown up close:


What are you working on this week?  Please show us what's on your Design Wall.  The only request I have is that you refer back to this particular blog post somewhere within your blog post.  Thanks for joining in!


Monday, September 3, 2018

Design Wall Monday - September 3, 2018

Happy Labor Day!

Labor Day - a holiday to celebrate workers and their accomplishments!  What have you been working on this week? 

I apologize for the late posting last Monday, but the weather has caused lots of power outages here, and we were without power last Monday.  It's been stormy all week, and DH the golfer, has struggled to play golf (his "work").  Luckily for quilters, the weather doesn't dictate whether we can quilt or not - unless the power goes out.   Even then it doesn't stop those of you who have treadle machines!  Life is good.

Thanks for your input on my little nine patch quilt.  I've decided to use the first option of striped sashing, and have not picked out the cornerstone fabric yet. 


 Perhaps another cheddar fabric with a little flower that I can fussy cut.  Slow progress, but I've been working on a knitted Christmas stocking project for most of last week, and quilting will resume this week.

We have more pupa/chrysalis stage Monarch butterflies on the cabin porch this year than any previous year.  Here is a picture of three that decided one spot was the best location, and they lined up three in a row.  They are attached to the front porch ceiling and are out of the weather.  There are 7 chrysalises this year on the porch.  Last year there were only two, so 7 makes me happy.


I'm looking forward to seeing your pictures this week.  Design Wall Mondays is open to all quilters, just include a link to this particular blog post of mine somewhere within your blog post.  Thanks!


Monday, August 20, 2018

Design Wall Monday - August 20, 2018

This week I am working on a doll quilt using cheddar nine patches.  I am looking into four different layouts.  What do you think?

Option 1:

Use a striped fabric to create a fussy cut sashing and add fussy cut cornerstones. (cornerstones to be determined)


Option 2:

Use a cheddar print for plain squares and set the quilt on point.


Option 3:

Use white as sashing or as alternate squares for a simpler look.


Option 4:

More simple, as three is, but on point.


Let me know what you think - or if you think of any other possibilities. Thanks!

Today is Design Wall Monday, and I am looking forward to seeing what you have on your design wall.  The rules are simple - please link back to this particular blog post somewhere within your blog post.  The coffee is brewing and I am going to sit out on the deck with a cup of coffee, while looking at your creations this morning.

Hubby is out golfing this morning, and I have to brag about him - yesterday he won the Manistee National Senior Golf Championship.  He loves to golf as much as I love to quilt!

Penny Lane is 40 pounds!  We can't believe it, but it is so.  She loves to chew on sticks, and up here at the cabin, there are plenty of sticks in the yard.  She sat in the hammock with me yesterday afternoon and chewed on sticks for about half an hour.  Life is good!


Monday, May 21, 2018

Design Wall Monday - May 21, 2018

Here is another "brick wall" type of quilt that I made this week.  I had a ziplock bag full of rectangles, indigo and shirting - I think they were left from mis-cutting some blocks, but I don't remember.  I put them together and made a little doll quilt top (12 in. by 16 in.)


There wasn't a lot of playing in the quilt room because I've been busy procrastinating on putting the Jane Stickle quilt together.  Hopefully, I will continue on with that project next week.

Here is a picture of one of the fabulous trees here in Michigan.  Everything is in full bloom:


And the most exciting news of this week is:  We got a puppy Saturday night!
We have not named her yet, what do you think we should name her?  She is a yellow labrador, and is 7 weeks old.  A little bundle of joy!


Please link up to Design Wall Monday as usual, and show me what you are working on this week.  Hopefully this cutie will have a proper name by next Monday!  Can't wait to hear what you think her name should be.


Monday, May 14, 2018

Design Wall Monday - May 14, 2018

After two weeks of working on fiddly paper pieced and appliqued triangles, I decided this week to make something with a much easier plan.  This doll quilt is one that I have admired for years in a book, and it was such fun to make.  Here is the original doll quilt, called "Brick Wall"


I pulled reds and creams, pinks, and blacks from my stash.  Cut strips 2.5 inches wide and began to cut "bricks" from various fabrics, and sew them together into long rows (strips).  The rows were joined, and I revised my original plan to add another row to the top to include some more black bricks in the top section.  I whacked off the sides to even it up, and the quilt top is finished.  Easy, peasy, lemon squeezie.  No pinning, no matching of seams anywhere, and no problems.  It was so much fun to make, and was made in a day.  I have a red/black stripes fabric picked out for binding, and plan to round the corners as is shown in the old quilt.

Here is my version:


Measurements are 28" by 30" for the quilt top.  The original quilt is in a book titled "American Folk Art Quilts" by Maggi McCormick Gordon.  This book is available in hardcover, used, for about $4.00 (plus postage) from Thriftbooks.com, if you are interested in getting a copy.  I love to look at quilts in books, don't you?


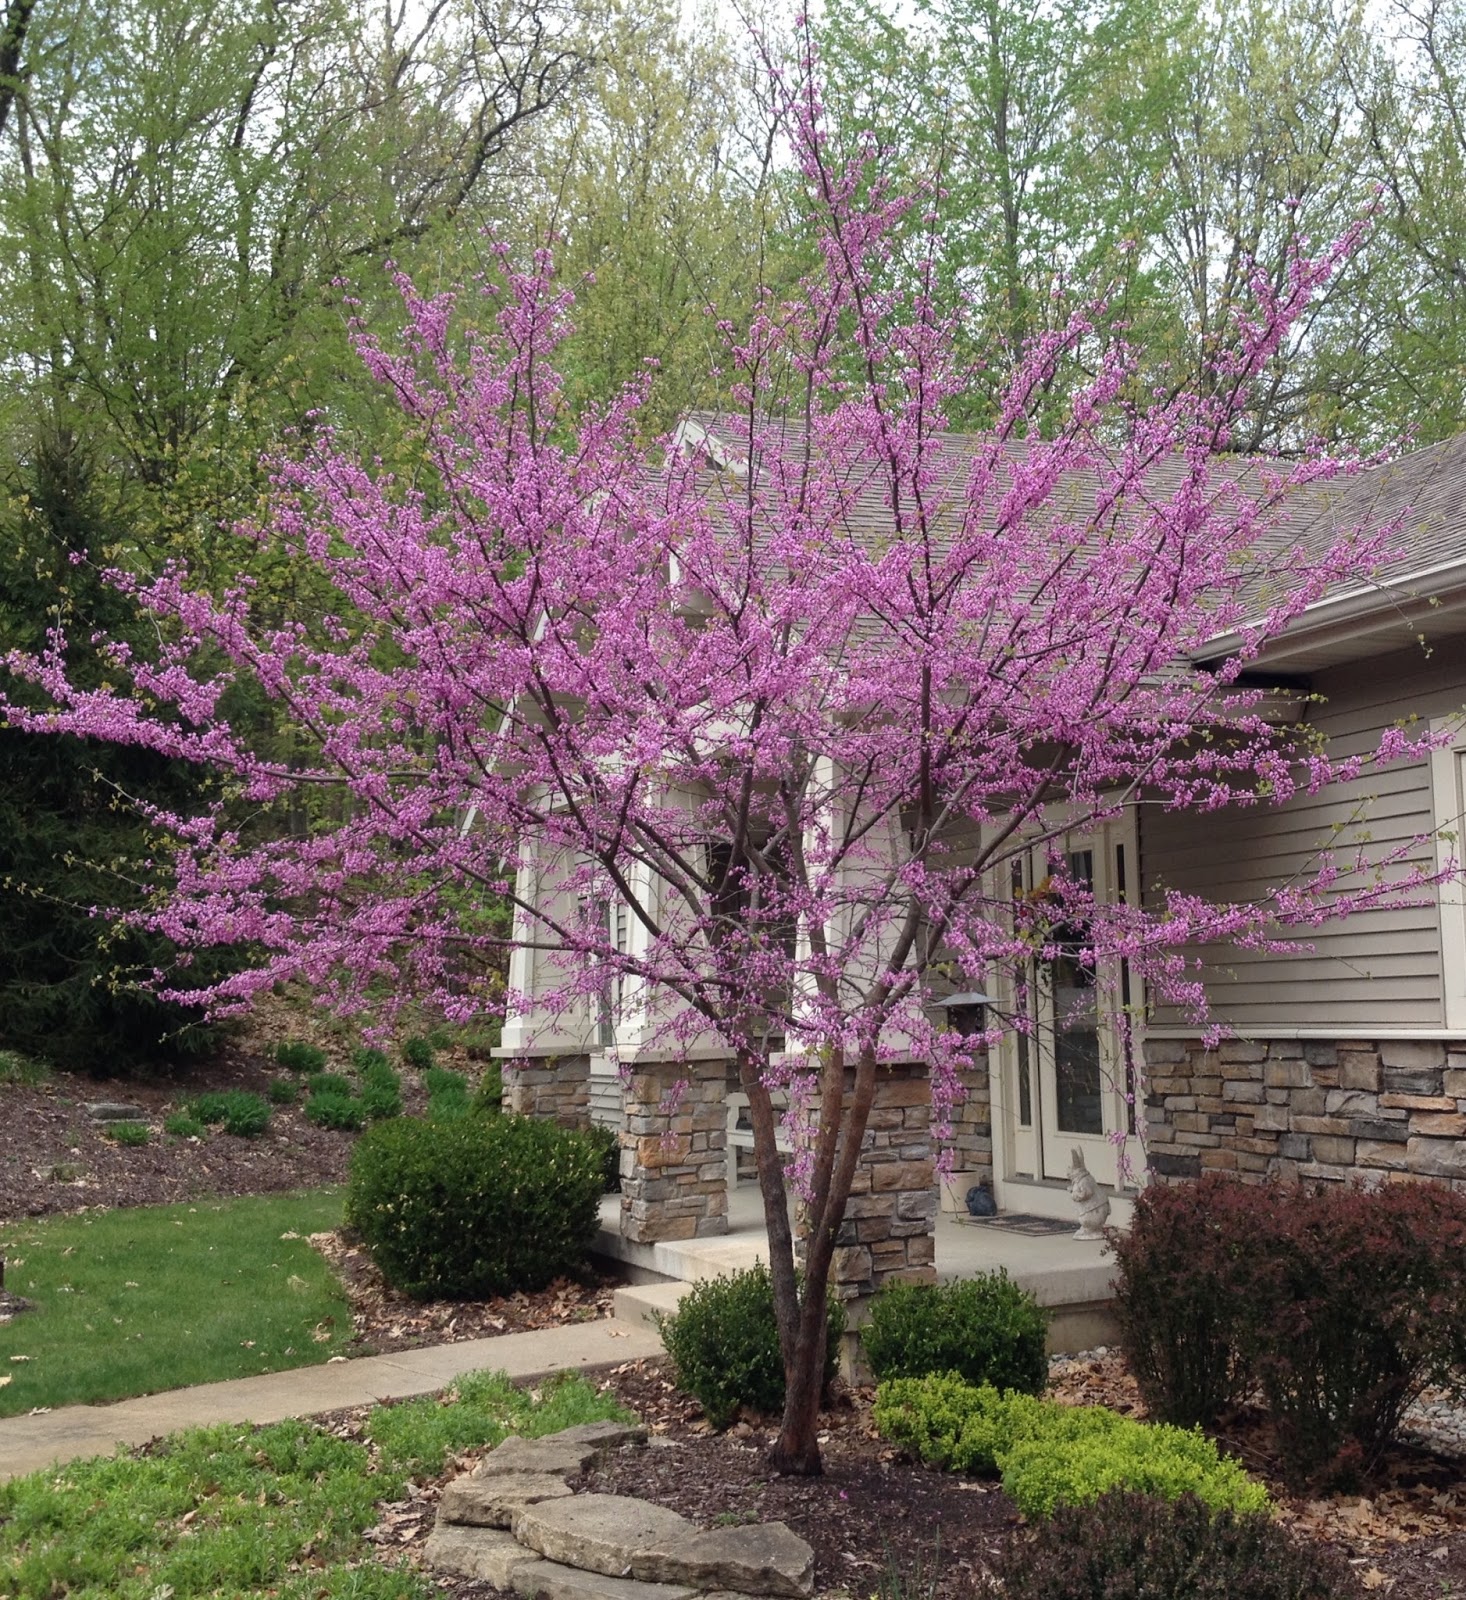
Spring has arrived in full force here in Michigan, and I'll close today with a picture of our Red Bud tree in the front yard:


Happy Mother's Day to all of you.  Thanks for linking with Design Wall Monday each week.  I appreciate you.

Please link back to this post somewhere within your post.  Your design wall posts last week were spectacular.  I looked at some each day during the whole week.  


Monday, April 16, 2018

Design Wall Monday - April 16, 2018

Today is my birthday, and I am celebrating being 75!  I have had a fabulous week, as I was on a quilt retreat in Shipshewana, Indiana for five days, and just got home last night.  While there, I finished four small quilts/doll quilts, and had a great time visiting with all of my friends who gather there each year.

Here is a table runner kit that I almost threw away. It was partially finished, and was giving me trouble.  It is made of loosely woven homespun fabrics, and when I tried to quilt some straight lines through it, I made puckers and pulls......so I set it aside for quite a while.  Recently, I decided what to do to rescue it:  I took out all of the quilting on the homespun, and added a border of small hsts that were given to me a few years ago, by Jill Shram, who sat near me at a previous Shipshewana retreat.

I liked it a lot better with the small triangles as a border, and I gave it minimal quilting this time, to avoid the previous trouble with the homespun fabrics.  Quilting is just around the apples, and along the border.  I have named it "The Apple Pie Table Runner"  and it will be on my dining table in the fall.


Here is a closeup of Jill's little left-over triangles that are now part of the table runner.  They finish at one inch.


Thank you Jill!  

This retreat, I visited my friend Rebecca Haarer's antique shop, and bought an old ladder, for displaying doll quilts in my quilt work room.  If you are in Shipshewana, Indiana, I recommend stopping at her shop; there are lots of antique quilts, and other goodies there.  

Here is my new display ladder, with the doll quilts on it that I brought to the retreat for show-n-tell night.


What have you been working on?  I can't wait to see.

I say this every week, so here are the details again: 

If you are linking with Design Wall Mondays here, please link back to this particular post somewhere within your current post.  I appreciate it so much when you do.

Use this web address when you fill out the "link" information:

http://smallquiltsanddollquilts.blogspot.com/design-wall-monday-april-16-2018.html

and not the generic address for my blog (http://smallquiltsanddollquilts.blogspot.com)


Monday, April 9, 2018

Design Wall Monday - April 9, 2018

This week wasn't very productive - I trimmed some small hsts that someone gave me, and tried to arrange them into a doll quilt.  This is what I started out with:


But it didn't speak to me, so I looked for another alternate square.  The white with polka-dots seemed too similar to the pinwheel blocks.  I auditioned another fabric and liked it better:


I made the doll quilt, and it measures 20 inches by 18 inches, with the pinwheel blocks at 1.5 inches square....meaning the hsts are 3/4" by 3/4" square.  No wonder my friend gave them away to me......I must learn to say no.

Here is the finished top with mitered corners.  I shall bind it with the same plaid.


So, while I wasn't very productive in the quilting department, I scored some points with hubby Sunday when I made a turkey pot pie, and an apple pie.


What have you been doing?  I hope to hear from a lot of you today, as I will be sitting at the hospital with my sister all morning while she has surgery, and I will need the distraction.  (minor surgery, so not too stressful)

Design Wall link-up instructions are the same each week.  Please link back to this particular post somewhere within your current post.  I appreciate it so much when you do.

Use this address when you click on the "link" button:

http://smallquiltsanddollquilts.blogspot.com/2018/04/design-wall-monday-april-09-2018.html

and not the generic address of http://smallquiltsanddollquilts.blogspot.com


Monday, April 2, 2018

Design Wall Monday - April 2, 2018

The Making of A Doll Quilt

Since I squared up so many "spare parts" hsts lately, I was in the mood to make a new doll quilt.  Here is the finished quilt, and notes on the process:


The picture I used for inspiration:  I liked the four spots of red, and I liked that the center one was not red, and I liked that it used a lot of hst's - which is what I want to use!  I'm not sure what size the vintage quilt is, but I wanted to use the 1.5 x 1.5 cut size hsts on hand.


First, I sorted through my shoebox full of 1.5 by 1.5 hsts.  I sorted out some red and light hst's and made four 4-patches of hsts, and chose a 5th non-red middle four patch.  Four patches finish at 2 in. by 2 in.


Then, I sorted out blue and light hsts to make the rectangles using 6 hsts.  Here's a picture of eight sets on a chair, right next to my sewing machine:


When I sew these, I sew three seams in a chain piecing - sewing the top two together, the middle two together, and then the bottom two together without breaking the thread.  


Then I press them all open, and sew the two remaining seams connecting the top 2 to the middle 2, and then those 4 to the bottom 2:


They nest together without pinning, and the process goes very quickly.  


After the rectangle is sewn together, I found that the last two seams were flatter pressed open.  I had to clip the little connecting thread from the first chain sewing to press the seams open.

Note:  You may notice that some of the original seams on the hsts were pressed open, some not, because they were made at different times, and are in the "parts factory" as is.  It didn't seem to make much difference which way they were pressed, but the last two seams on the rectangle definitely needed to be pressed open.


Then, using the design wall, I put up the parts as I made them.   I didn't pay much attention to which way the triangles were going, as the original quilt maker didn't either, and I didn't want to think too much while making this quilt.


Next, I intended to cut some plain white muslin for the four bigger plain squares.  But a piece of shirting was on the cutting table, and I used that.  With the four 3.5 x 3.5 squares, the setting squares,  the hanging triangles on the back, I found that little piece of shirting was just enough.  I also had to make some partial four patches for edge pieces, at the middle of each side of the quilt.

Here is the layout:


The batting is a small piece of flannel, and I followed the vintage quilter's quilting pattern, keeping it very simple.  


For the binding, I looked through my drawer of bits of left-over bindings from large quilts, and found some dark navy that I could use.  It was double fold, cut 2.5 inches wide and was half as much binding as I would need.  I cut it to 1.25 x 1.25, and used it as single fold binding, and made it work.

For one last step, I made some tea, admired my work, and had a cup of tea. 

Then soaked the little quilt in a pot of tea, to age it just a bit.  The two glasses are on top of the quilt for weight, to keep it under the tea.  The cloth hanging over the edge is muslin with the loose tea in it (a big "tea bag").


Sophia Grace and Rosie are very pleased.  It measures 13.75 in. x 13.75 in.

So what have you been up to this week?  Yesterday was Easter Sunday, so I didn't get much sewing done, but I had a great time with family, and I hope you did too.

Design Wall link-up instructions are the same each week.  Please link back to this particular post somewhere within your current post.  I appreciate it so much when you do.

Use this address when you click on the "Link" button:

http://smallquiltsanddollquilts.blogspot.com/2018/04/design-wall-monday-april-02-2018.html

and not just the generic: http://smallquiltsanddollquilts.blogspot.com

We had 42 link-ups last week!  Very much encouragement and new ideas!